
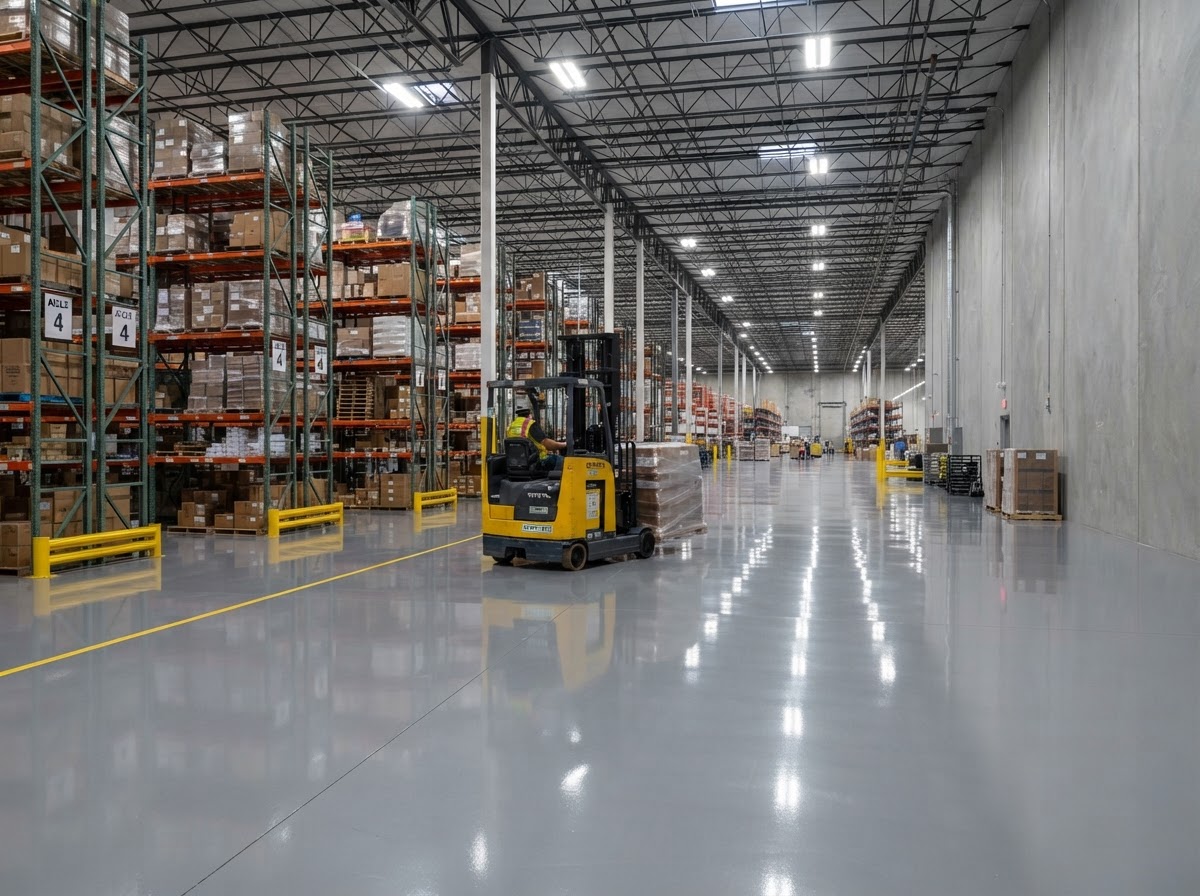
Commercial Flooring Preparation, Process, and Care
The step-by-step installation process for a commercial epoxy floor — from slab prep through topcoat — plus the maintenance that keeps it in service.
Commercial & Warehouse Flooring
2026-10-15
A commercial floor is only as durable as the preparation underneath it — and in a working facility, that durability is measured in uptime, not just appearance. The heavy-duty system — basecoat, build coats, topcoat — bonds to a mechanically prepared slab, and every step in the process exists to make that bond hold up to the traffic the floor will see for years. Here is what the installation actually involves, step by step, and how to maintain the floor once it's in service.
KD Epoxy Floor installs commercial and warehouse flooring across South Florida, from Palm Beach County to the Florida Keys. We follow the same process on every commercial floor because the steps are what make the system perform under traffic. Understanding the process helps you plan the installation around your operations — and knowing the maintenance routine helps the floor stay in service for years.
Step 1: Assess and prepare the slab
Before any coating goes down, we assess the slab for moisture, check any existing coating for adhesion, and identify cracks, spalls, and joints that need repair. In a commercial facility, we also assess the traffic, the chemical exposure, and the thermal cycling the floor will see — because the system is specified by the conditions. The assessment tells us what the floor needs before we quote it.
We then diamond-grind the slab to open the surface and remove contaminants — old sealer, oil, laitance, curing compounds — that would prevent the epoxy from bonding. Profiling creates the texture the basecoat locks into. For a commercial floor, the grind also prepares the joints — control joints, expansion joints, construction joints — which may need to be cleaned, repaired, or sealed before the coating goes down. See our diamond concrete preparation and polishing for the full prep scope.
Step 2: Repair cracks, spalls, and joints
Cracks are routed and cleaned to sound material, then filled with a material matched to the crack type. Spalls and holes are patched with compounds suited to the slab and the traffic. Joints — the biggest variable in a commercial floor — are assessed for whether they need to be filled, sealed, or left as movement joints. A joint that's left open collects debris and breaks the coating at the edge; a joint that's filled needs a filler that can handle the traffic without crumbling.
The repair is leveled and profiled so the commercial system bridges a sound, smooth surface. See our concrete crack and hole repair for the repair scope. In a commercial floor, the joint and crack repair is what makes the coating hold up at the edges — because a coating that fails at a joint fails the whole floor.
Step 3: Apply the basecoat and build coats
The heavy-duty basecoat is applied to the prepared slab. The basecoat saturates the surface and creates the bond. Build coats follow — additional epoxy layers that add the thickness and the abrasion resistance the traffic demands. The number of build coats depends on the specification: a light-traffic floor needs fewer; a heavy-traffic floor needs more. Each coat is applied within the product's recoat window so the layers bond to each other chemically.
The build is what makes a commercial floor hold up to forklifts and pallet drag. A residential-thickness epoxy would wear through under that traffic; a commercial build is engineered for it. We follow the manufacturer's build specifications exactly — because under-building is how a commercial floor fails in months instead of years.
Step 4: Topcoat and line striping
The topcoat is the clear or pigmented coat that seals the system and provides the wear surface. It's specified by the exposure: epoxy for dry traffic, polyurethane for chemical and UV resistance, polyaspartic for fast cure. The topcoat is what takes the abrasion, the chemicals, and the thermal cycling — and it's where under-specification shows up first.
Optional line striping — walkways, forklift lanes, hazard zones, safety markings — is applied after the topcoat. Line striping turns the floor into a traffic management tool, and it's part of the commercial system when the space needs it. The topcoat can also carry an anti-slip aggregate for traction. See our slip-resistant flooring systems for the traction scope.
Installation steps at a glance
- Assess — moisture, traffic, chemicals, joints
- Grind — diamond-grind and profile for adhesion
- Repair — cracks, spalls, and joints
- Basecoat — heavy-duty basecoat applied
- Build coats — thickness and abrasion resistance
- Topcoat and striping — wear surface and traffic markings
The cure window and downtime
After the topcoat goes down, the floor enters its cure window. The cure time depends on the system: a polyaspartic topcoat can accept traffic in hours, while an epoxy topcoat may take a day or more for pedestrian traffic and several days for full vehicle or forklift traffic. South Florida's heat and humidity affect cure time, and we tell you the exact timing for your system.
We plan the installation around your operations — nights, weekends, or phased sections — so the floor is back in service as fast as the cure allows. For a facility that can't be down, a polyaspartic system with a fast cure may be the right choice. For a facility with downtime tolerance, a heavy-duty epoxy build delivers the performance at a lower cost. We help you balance the cure window against the operations.
Maintaining a commercial floor
The maintenance routine keeps the floor in service. Sweep or scrub regularly — a commercial floor takes constant traffic, and the debris that traffic brings abrades the topcoat if it's not removed. For a warehouse, that means regular sweeping and periodic scrubbing. For a commercial kitchen or a food-processing floor, it means a sanitation routine that the seamless surface supports.
Clean spills promptly — the topcoat resists chemicals, but wiping up spills keeps the finish sound and prevents staining. For a floor that sees oil or chemicals, prompt cleanup prevents the exposure from breaking down the topcoat over time. If the topcoat wears in high-traffic areas, a recoat restores it without removing the whole system — the build underneath is still sound, and a recoat is how you refresh the floor without redoing it.
We can set a maintenance schedule based on the traffic so the next recoat is planned, not reactive. A commercial floor that's maintained stays in service for years; one that's neglected fails at the topcoat and costs the business a recoat or a redo far sooner. See our coated floor renovation and maintenance for the maintenance scope.
Commercial floor maintenance
- Sweep or scrub regularly — debris abrades the topcoat
- Clean spills promptly — keep the topcoat sound
- Recoat high-traffic areas when wear appears
- Set a maintenance schedule based on traffic
- Inspect joints and repairs periodically
Frequently asked questions
How long does a commercial floor installation take?
It depends on the size, the system, and the downtime plan. A polyaspartic system can accept traffic in hours; an epoxy build may take a day or more for pedestrian traffic and several days for full traffic. We plan the installation around your operations — nights, weekends, or phased sections — and tell you the exact timeline after the assessment.
How do I maintain a commercial floor?
Sweep or scrub regularly to remove the debris traffic brings, clean spills promptly to keep the topcoat sound, and recoat high-traffic areas when wear appears. A maintenance schedule based on the traffic keeps the floor in service for years. See our coated floor renovation and maintenance for the full maintenance scope.
Can the floor handle forklift traffic?
Yes — a heavy-duty commercial build is engineered for forklift traffic, pallet drag, and constant heavy loads. The build thickness and the topcoat specification are matched to the traffic. An under-specified floor fails; a properly specified floor holds up for years.
How soon can the floor take traffic?
It depends on the system. A polyaspartic topcoat can accept traffic in hours. An epoxy topcoat may take a day for pedestrian traffic and several days for full vehicle or forklift traffic. We match the product to your downtime tolerance and tell you the exact timing for your system.
Do you do line striping?
Yes — we apply walkway lines, forklift lanes, hazard zones, and safety markings after the topcoat. Line striping turns the floor into a traffic management tool, and it's part of the commercial system when the space needs it.
Do you serve my area?
We serve South Florida from Palm Beach County to the Florida Keys. Share your project city or ZIP and we'll confirm availability before scheduling your estimate.
Ready for a commercial floor that holds up? Request a custom estimate and we'll assess your facility.
More about Commercial & Warehouse Flooring
What Is Commercial & Warehouse Flooring? Suitability and Common Questions
A clear guide to heavy-duty commercial and warehouse epoxy flooring — what it is, where it's required, and the questions facility managers ask before coating a working floor.
Commercial Flooring Options, Comparisons, and Cost Factors
How epoxy, polyurethane, and polyaspartic commercial systems compare — and what drives the cost of a heavy-duty working floor.
Commercial Flooring Mistakes, Misconceptions, and How to Avoid Them
The common mistakes that undermine commercial and warehouse floors — from under-specification to poor joint prep — and how to prevent them.